20 Hacks For A Clean And Organized Desk Setup
In today’s fast-paced world, maintaining a clean and organized desk setup is essential for enhancing productivity, focus, and overall well-being.
A cluttered workspace can negatively impact your ability to concentrate and complete tasks efficiently, while a well-organized environment fosters creativity and motivation. In this article, we will explore a variety of hacks designed to transform your desk into a functional, aesthetically pleasing, and organized space.
From decluttering techniques to smart storage solutions, these tips will help you create a workspace that promotes productivity and leaves you feeling in control of your professional life. Let’s dive in and discover the secrets to achieving a clean and organized desk setup that will make your workdays more enjoyable and efficient.
1. Declutter your desk
Begin by conducting a thorough assessment of the items on your desk. Remove any unnecessary objects and create a clean, focused workspace that promotes productivity. Store rarely used items in designated spaces like drawers, shelves, or storage boxes. Regularly decluttering your workspace keeps distractions at bay and reinforces organizational habits.
2. Manage your cables
Tackle cable clutter by employing cable organizers, zip ties, or cable clips to keep cords neatly bundled and organized. A well-managed cable system not only enhances the visual appeal of your workspace but also contributes to a more efficient and stress-free work environment, as you’ll spend less time untangling and searching for the right cable.
3. Use a monitor stand or riser
Position your monitor at a comfortable, ergonomic height using a monitor stand or riser. This helps reduce eye strain and improve posture, while the additional space underneath can be utilized for storage or as a designated area for your keyboard and mouse. An organized desk space promotes better work habits and enhances productivity.
4. Create designated storage zones
Allocate specific areas or containers for various items, including office supplies, personal items, and important documents. Designated storage zones simplify locating items and make it easier to keep your desk tidy, ultimately increasing your overall efficiency and focus during work.
5. Utilize drawer organizers
Implement an organized drawer system using dividers, trays, or small containers. An orderly drawer system ensures that the contents of your desk drawers remain tidy and easily accessible, reducing frustration and promoting a clutter-free workspace.
6. Make use of vertical space
Maximize your workspace by installing shelves, wall-mounted organizers, or using stackable desk organizers. These vertical storage solutions provide ample storage for your belongings without encroaching on your valuable desk surface, keeping your workspace clear and organized.
7. Label your storage
Attach labels to containers, drawers, and shelves to clearly identify their contents. This makes locating and storing items a breeze, saving time and helping you maintain a well-organized workspace, which ultimately contributes to a more efficient work environment.
8. Keep frequently used items within reach
Arrange essential items in easily accessible locations on your desk to minimize distractions and save time. Having frequently used items close by not only promotes efficiency but also encourages you to keep your workspace organized.
9. Use a desk mat
A desk mat not only protects your desk surface but also helps define specific areas for your keyboard and mouse, contributing to a tidy and organized workspace. Additionally, desk mats add a touch of visual appeal and can help delineate your working area, making it more inviting.
10. Embrace digital organization
Transition to digital systems whenever possible to minimize physical clutter. Create a well-organized digital environment by sorting files into folders, using cloud storage for backups, and employing productivity tools like calendar apps and note-taking software. A streamlined digital workspace enhances overall organization and efficiency.
11. Implement a regular cleaning routine
Set up a schedule for regular cleaning sessions to maintain your organized desk. Clean surfaces, dust electronics, and store stray items during these sessions. This prevents clutter from accumulating and ensures your workspace remains clean, inviting, and conducive to productivity.
12. Personalize your workspace
Add personal touches to your desk, such as plants, framed photos, or artwork, to create a warm and inviting atmosphere. A personalized workspace fosters creativity, motivation, and a sense of ownership, making it more likely that you’ll maintain a well-organized and tidy space.
13. Prioritize ergonomics
Create a comfortable and ergonomic workspace by adjusting your desk, chair, and computer setup to promote proper posture and minimize strain. A comfortable workspace encourages you to spend more time at your desk, increasing the likelihood of maintaining an organized and clutter-free environment. Consider investing in ergonomic accessories like wrist rests, footrests, and adjustable chairs to further enhance your workspace comfort. Additionally, ensure that your workspace has proper lighting to reduce eye strain and create a more pleasant atmosphere.
14. Set up a filing system
Establish a filing system for your physical documents, using folders, binders, or filing cabinets. Organize your files by category or project, and use labels or color-coding to make it easy to locate specific documents. A well-organized filing system prevents paper clutter from accumulating on your desk and makes it easier to access important information when needed.
15. Utilize wall space
Make the most of your wall space by installing pegboards, magnetic boards, or corkboards to hold office supplies, notes, or artwork. This keeps essential items within easy reach without taking up valuable desk space, and also provides a visually appealing way to stay organized.
16. Create a daily organization routine
Establish a daily routine for organizing your workspace at the beginning and end of each workday. This could include tidying up your desk, filing away documents, or updating your to-do list. A consistent routine helps you maintain an organized and efficient workspace, making it easier to stay focused and productive.
17. Use storage solutions that fit your needs
Choose storage solutions that suit your specific organizational needs and preferences. This could include desktop organizers, under-desk storage, or modular storage systems. Selecting the right storage solutions will help you maintain an organized workspace that feels both functional and aesthetically pleasing.
18. Establish a workflow system
Develop a system for managing your tasks and projects, such as using a to-do list, project management software, or a physical planner. A well-structured workflow system helps you stay organized and focused, ensuring that you always know what tasks need to be completed and when.
19. Keep a trash can and recycling bin nearby
Place a trash can and recycling bin close to your desk to make it easy to dispose of waste and recyclables. This prevents clutter from building up on your desk and encourages you to keep your workspace clean and organized.
20. Use a dedicated space for personal items
Designate a specific area or container for personal items, such as your phone, wallet, and keys. Keeping personal items separate from your work area helps maintain a clear distinction between your professional and personal life, promoting better organization and focus.
Check these accessories to keep your desk clean and organized.
Lint Roller
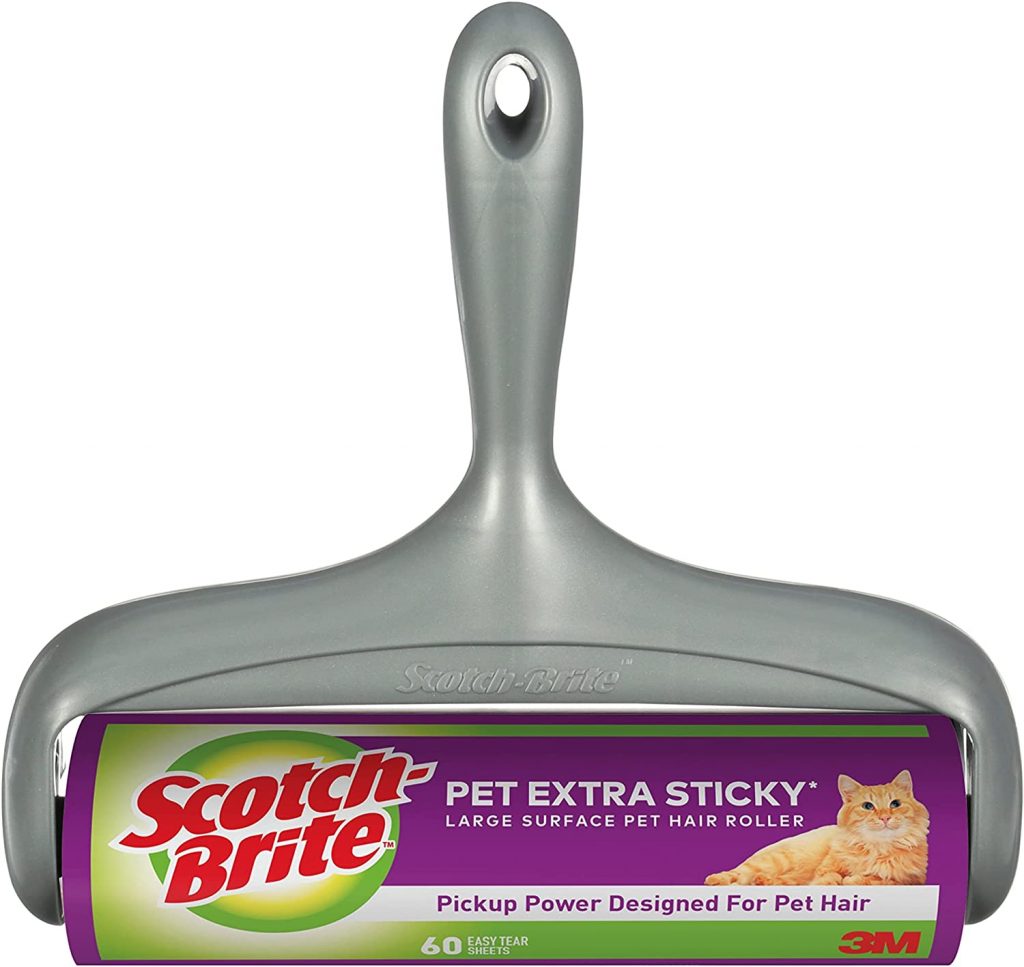
You’re probably wondering why a lint roller. This is your regular lint roller that is used for cleaning your clothes and stuff. However, this is going to be handy for keeping your desktop clean, especially the mouse pad.
Many home owners have pets, which means a lot’s of pet hairs on the mouse pad. There can be dust or maybe you eat at your desktop and there’s crumbs dust on your mouse pad.
All that stuff is naturally gonna accumulate on your desk pad, and using a lint roller is the perfect remedy to clean all of that. I have experienced that when you wipe a mouse pad with your hand, you’re just smearing not only the oils from your hands onto your desk pad but whatever you’re trying to clear off could also be smeared and damage the surface of your mouse pad.
Using a lit roller will pick up all the dust and whatever you’re trying to clean right of your mouse pad. This will keep the mouse surface safe from wearing down soon.
Air Blower
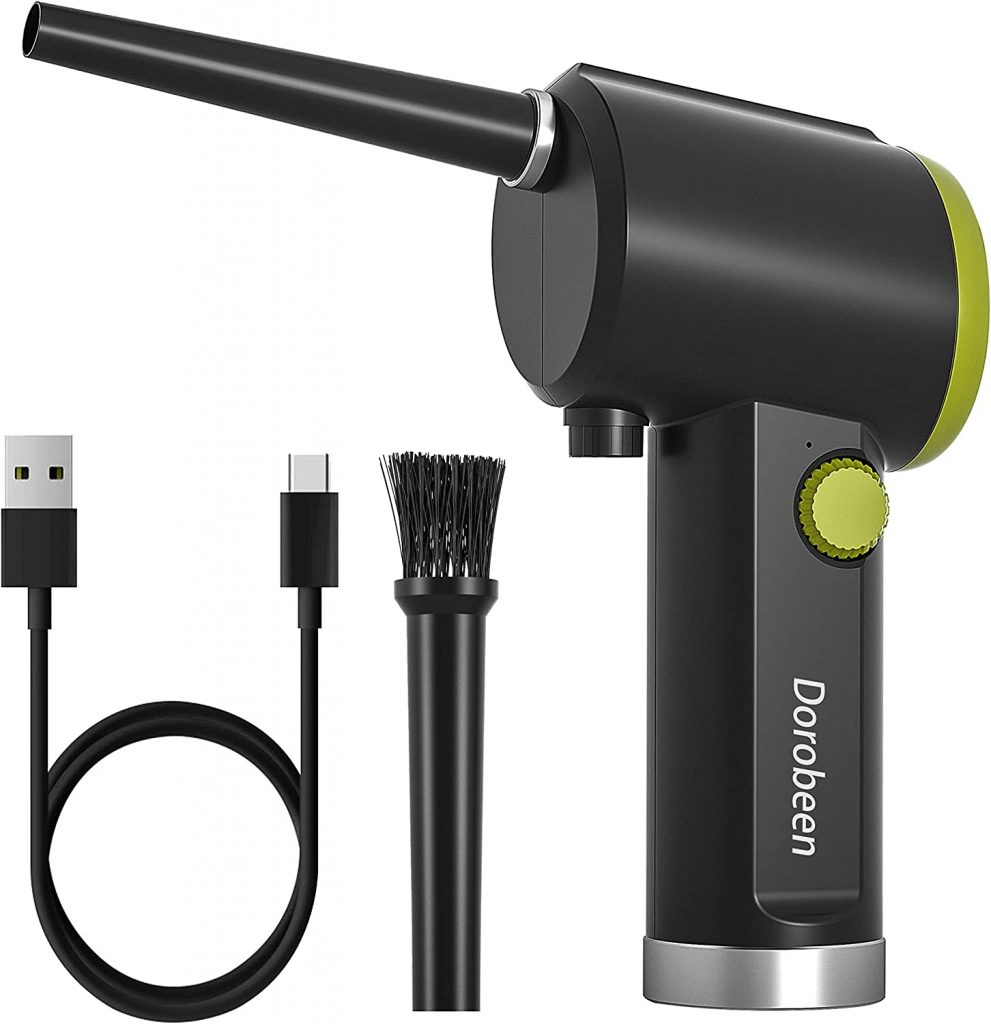
You can buy an electric air blower, if you don’t already have one. It is great for keeping the desktop clean, blowing off all that dust. The one I have is from Mel geek. It is super small, compact but powerful.
It is also very useful for blowing off the dust between the keys of your keyboard. I have a pet cat, and there are so many hairs around. Just blow the hairs out of the keyboard and use a lint roller to clean.
Doolkin Laptop Mount
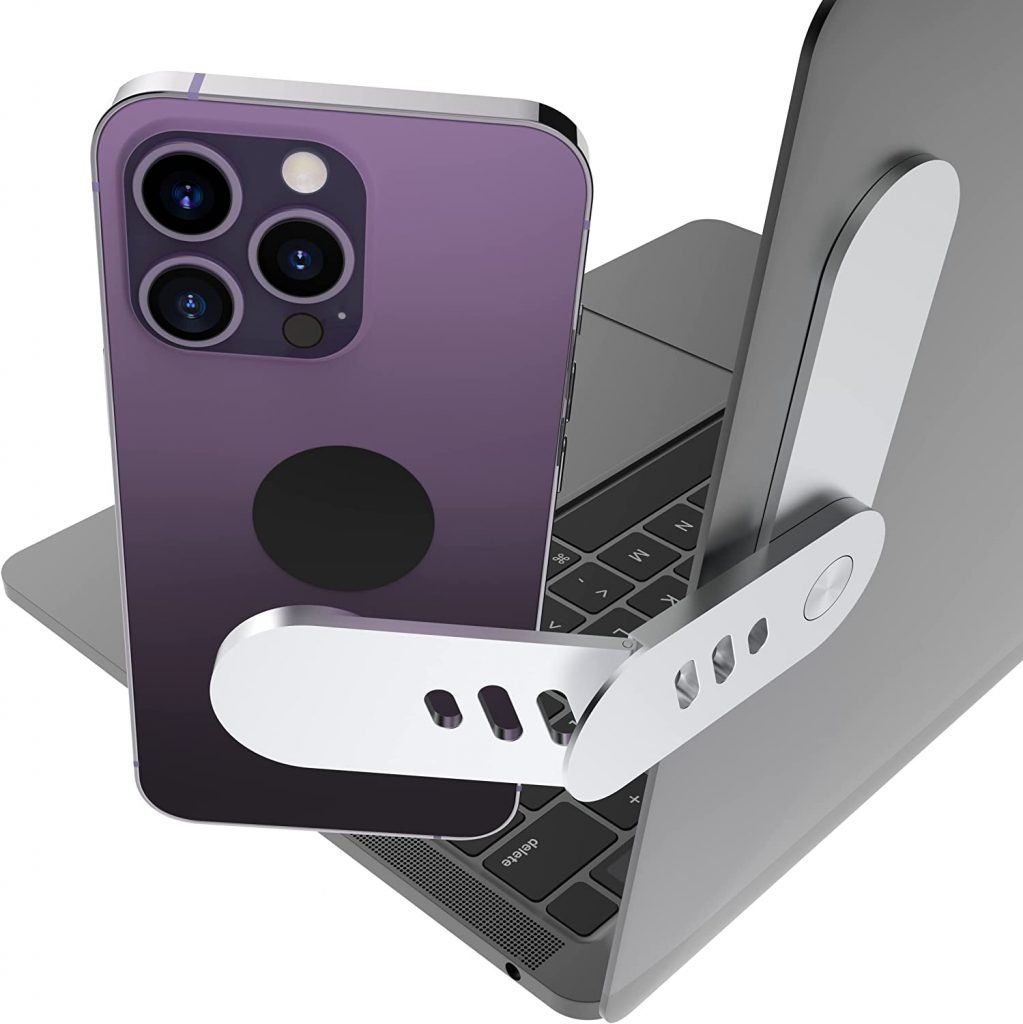
Doolkin laptop Mount is a tiny foldable magnetic Mount system that can be the perfect companion to the side of your laptop. You can also attach it to your monitor and that is how I use it.
The beauty of it is the design and its flexibility as it tucks away when not in use. You can just fold it out when you need it and fold it back when you want it out of the way. It has built-in magnet, so you can use it with many things made of metal.
I have used it for streaming, mounted an Elgato key Light mini to illuminate me during my streams, and even hanged my headset. It can be a great space saver too. I’m sure some of you will find more creative ways to use this gadget.
Invisible phone charger
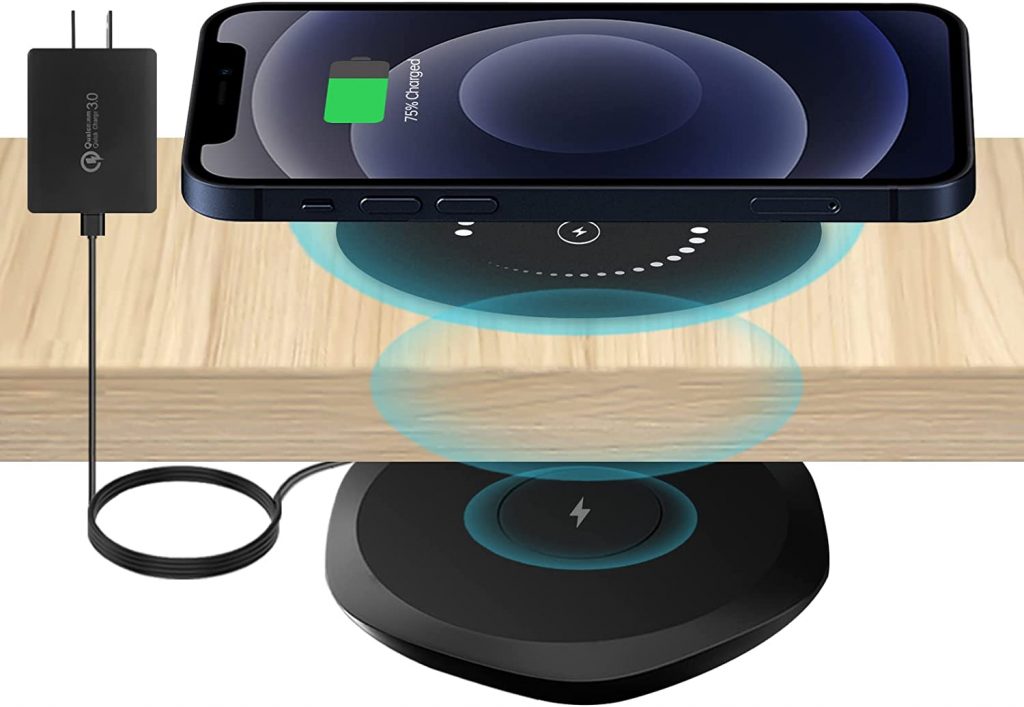
Invisible phone charger is one of my favourite gadget but I think it still needs some improvements. It require some visible parts to get it working but once it is hooked up it’s totally invisible.
The package includes a wireless charging pad, a bracket to hold it, and a coiled sticker. They also include magnets to make sure that everything is aligned properly. Make sure to confirm the thickness of your desktop because if it is too thick then the charger won’t work.
Once you decide where you want to place the wireless charger using the magnets on the bottom side of your desk, stick the bracket right in the middle through the magnets and this will then align it perfectly.
After that you you can slide in the wireless charger so it charges through your desktop surface without you needing anything physically on your desktop. To strengthen that wireless connection the conductive cheek coiled sticker will go directly on top of where the pad is mounted underneath.
You can even hide it under your mouse pad and it will still charge your phone. Once again, make sure the desk is not too thick for wireless charger to work.
Monitor Top Shelf

With the emphasis of cutting down clutter on the desktop, let me introduce this monitor top shelf. It is made to sit on the top of your monitor, and act as extra storage space for your stuff that may have lying on your desk.
The monitor shelf has three sticky gel pads to help keep it in place and the adjustable kickstand on the back will then just lock into the back side of the monitor for extra support. In terms of size, the shelf is thirteen inches long and three and a quarter inches in depth.
It can be used to keep smaller things or extra peripherals out of your way when you’re not using them. No more loosing flash drives because it is great for holding flash drives and memory cards.
Not only the monitor but this can also be used with a TV as well. Despite the overall thickness of your display or even if it’s a curved monitor, the bracket will make sure it fits.
Cable Management Box
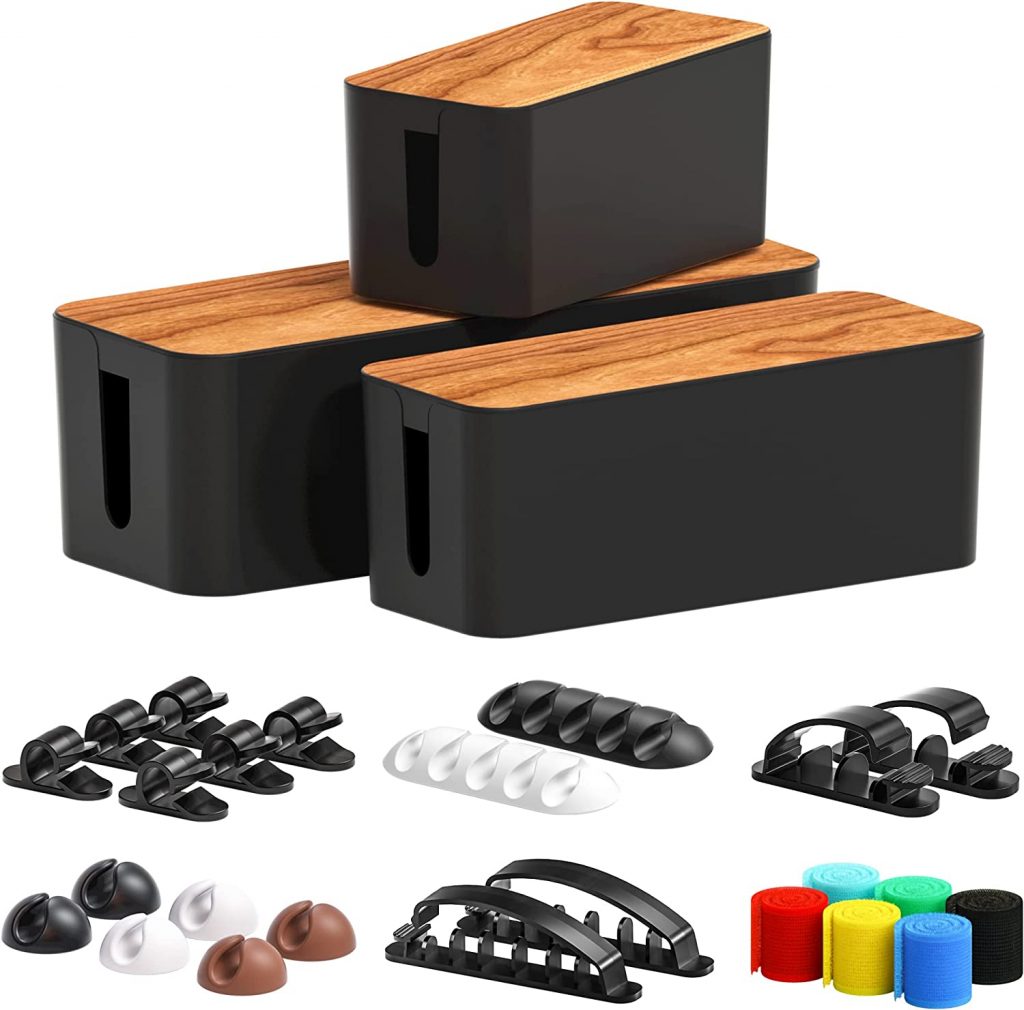
In terms of cable management, these three Cable Management boxes are amazing to have. Yes, you read it right, the package contain three boxes. They differ in sizes.
The smallest one have a bunch of cable management accessories, which include six single cable mounts, two multi-cable mounts, a pack of labels, zip ties plastic cable locks, and six velcro strips.
These boxes are great for hiding power bricks instead of having them on the floor. So, instead of having cable spaghetti on the ground, you can tuck them in a box. You can use additional boxes for different purposes.
Check out these guides on cable management:
How to hide cords on computer desks
Managing cables on a glass desk
