Best Overwatch Settings in 2023
I had received a couple of requests to guide the best Overwatch settings for the current year (2021). So, here it is. This guide will help you increase FPS and reduced input lag.
There are also some changes you can do outside the game, which I have picked up over the years of playing that would increase your performance, and you will get an advantage in competitive matches or the game in general.
Open up your game, and let’s do some in-game changes from the settings and set these to the highly competitive settings possible.
Overwatch System Requirements
| Minimum Requirements | Recommended Specifications | |
| OS | Windows® 7 / Windows® 8 / Windows® 10 64-bit (latest Service Pack) | Windows® 7 / Windows® 8 / Windows® 10 64-bit (latest Service Pack) |
| Processor | Intel® Core™ i3 or AMD Phenom™ X3 8650 | Intel® Core™ i5 or AMD Phenom™ II X3 or better |
| Video | NVIDIA® GeForce® GTX 460, ATI Radeon™ HD 4850, or Intel® HD Graphics 4400 | NVIDIA® GeForce® GTX 660 or AMD Radeon™ HD 7950 or better |
| Storage | 30 GB available hard drive space | — |
| Internet | Broadband internet connection | — |
| Resolution | 1024 x 768 minimum display resolution | Full HD (1920 x 1280) |
| Memory | 4 GB RAM | 8 GB RAM |
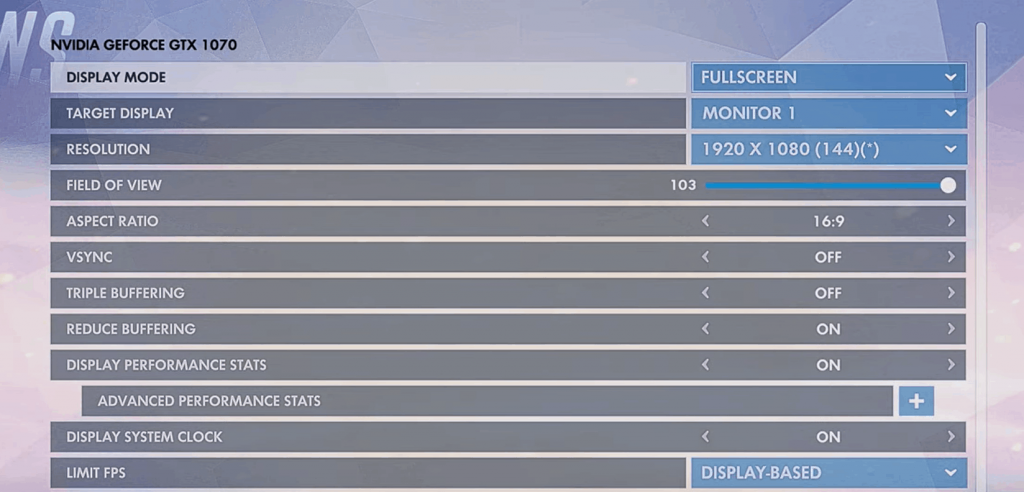
Display Mode: Full Screen
Starting with the display mode. It should always be full screen as it gives you the most amount of FPS and the least amount of input blank.
Target Display
Target display should, of course, be the monitor you play on.
Resolution
Resolution is very important, and it should be the one at the bottom. Make sure you choose your native display with the highest resolution and the highest amount of Hertz (that’s the number in the brackets).
If your PC is not powerful enough to get maximum FPS on a high resolution, try lowering the resolution to get the most FPS. If you are using a 60Hz monitor and want to increase your FPS then check out this guide on How to Overclock Your Monitor for Gaming.
Field of View: 103
Your field of view should always be a 103 as it gives you a wider FOV (field of view).
Aspect Ratio: 16:9
You can skip the aspect ratio as it will be set by the resolution. But playing on an ultrawide monitor with 21:9 will cut off almost 30% of your FOV as opposed to providing you with a wider FOV. This is one of the downsides of using an ultrawide monitor.
VSync & Triple Buffering: Off
VSync and triple buffering should both be off. Because enabling them can increase the input lag, which is not something tolerable in competitive online games. It is recommended that you use a monitor that supports G-Sync or FreeSync.
If you have a 144Hz monitor, then you don’t have to worry about screen tearing. Screen tearing is not a problem if you are playing on 90+ FPS. So it’s better to leave it off.
Reduce Buffering
Reduce buffering should be on to lessen the input lag in your PC.
Display Performance Stats: On
It’s up to you if you want to keep track of the performance stats. If you are having issues with performance stats not showing up, then press CTRL +SHIFT + R.
Display System Clock: On
This is also up to you if you want to keep track of time.
Limit FPS: Display-Based
This is highly based on your PC as it will put more stress on it if you put that limit FPS to custom. On the other hand, by boosting it up to 300, your computer will constantly try to gain the highest number of FPS possible, and that may cause a huge amount of input lag that you may never really.
I have it on display based as it will limit the FPS near to the amount of Hertz my monitor can render. So, in my case, it’s around 144 Hertz.
Graphics Quality (Advanced): Epic
I’m using RTX 2060, and the game runs very well on Epic settings.
Render Scale
The first option, render scale, is probably the most important one in the whole game. Some people like having a 100% to have those clean edges, but I prefer 75%, where the outlines of enemies will be thicker. If you go to 50%, they will be even thicker than that.
The downside of having it lower than 100% will blur all the edges and all the models in the game. But don’t worry, I’ll cover a setting outside of the game which will lessen the blurriness you will see in the game caused by a lower render scale.
You can set the rest of the graphics settings as I have them. The image is attached below.

Texture Quality & Filtering: High & EPIC
I like having a texture quality and texture filtering quality to high and epic.
Local Fog Details: Low
Dynamic Reflections: Off
Shadow Detail: Medium
Shadow quality is set to medium to gain a competitive advantage where shadows can be seen around corners and such.
Model Detail & Effects Detail: Low
Lightning Quality: Low
Anti-Alias Quality: Off
Refraction Quality: Low
Screenshot Quality: 1x Resolution
Local Reflections & Ambient Occlusion: Off
Local reflections and ambient occlusion should both be off as my recommendation to gain the most FPS from the graphics quality setting in Overwatch.
Gamma Correction, Contrast & Brightness
I would put them slightly below the default to make the game brighter and more visible.
Controls
Now moving over to the controls settings and then the Hero section.
Allied Health Bars: Always
Show Friendly Outlines: Always
Make sure to click apply. This is for the in-game setting. Now close the game, and let’s do some changes outside of the game.
Desktop Settings
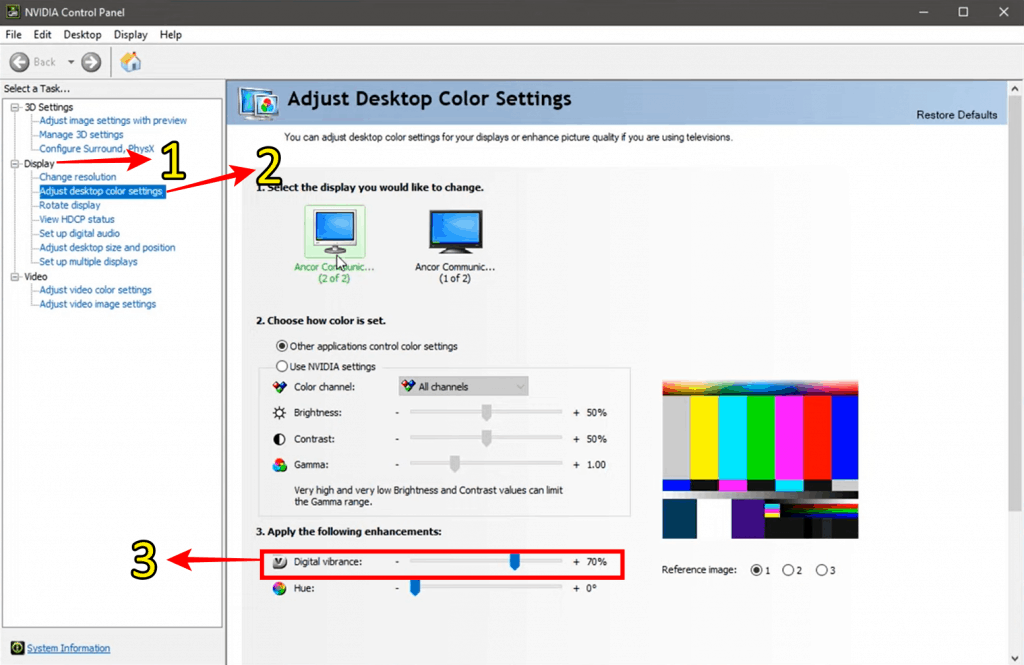
Right-click on the desktop and go to the “Nvidia control panel.” You can also search it in the Windows taskbar. Make sure to go over to display and then adjust desktop color settings.
This is not for everyone, but to gain that slight advantage within the game, I would put the digital vibrance up to 70 or 60. You will notice that your screen is a lot more vibrant and vivid between those two numbers, and colors in every application you run will also abide by this.
I have it on 70. Sometimes I put it down to 60, but it’s quite straining on the eyes to have it always like this. So I only do it when I’m gaming or jumping into a long competitive session.
Sharpness Filter
The next thing we’re going to do is cover the sharpness filter, which you can put on your game if you have an Nvidia graphics card. This does not apply if you have an AMD card.
Do you remember we put the render scale down to 75 or even 50 in-game settings, which causes the game to become blurry?
Good thing that NVIDIA has a very nifty feature where you can sharpen the image of the application you’re running.
Now, head over to the NVIDIA “GeForce Experience” by searching it in the taskbar. Make sure it is updated to the latest version, and you have a graphics card that supports this in game.
Then go to the settings and enable the in-game overlay.
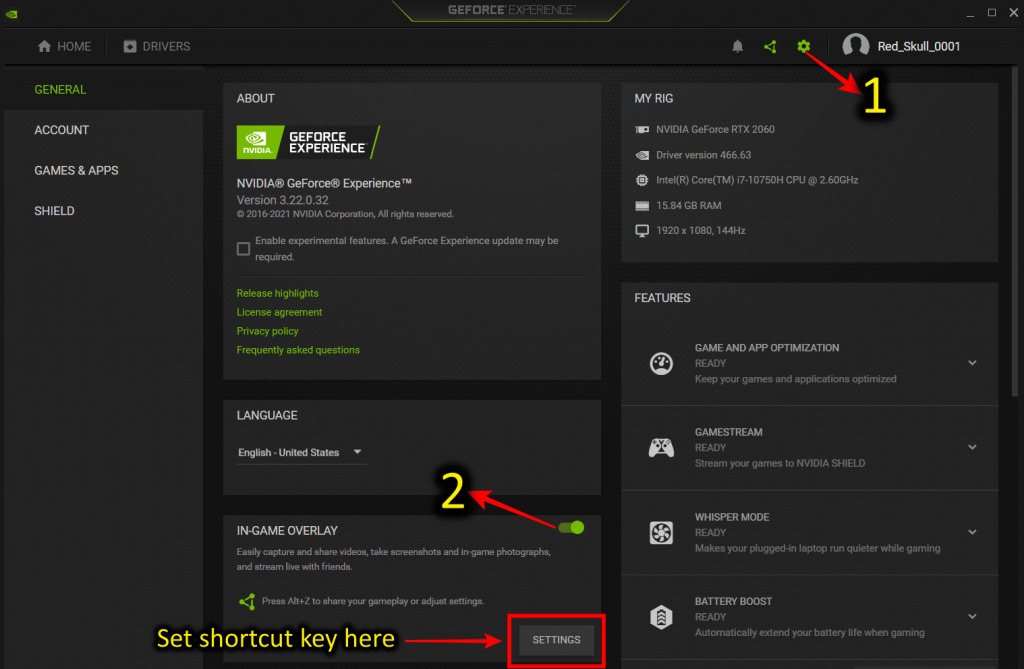
Once you do that, you might want to set up a keyboard shortcut so you can reach it easily. I have Alt + Z assigned to it. Press the shortcut, and a menu will appear, and we want to use the game filter option.
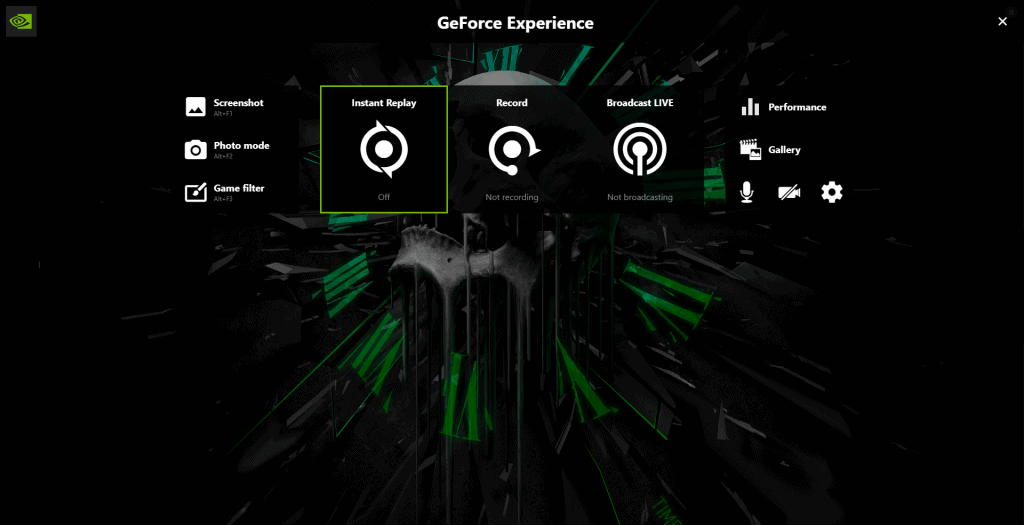
If you click on it, an error will appear saying, “a supported game is required to use this feature.” It’s because you need to run the game before using it.
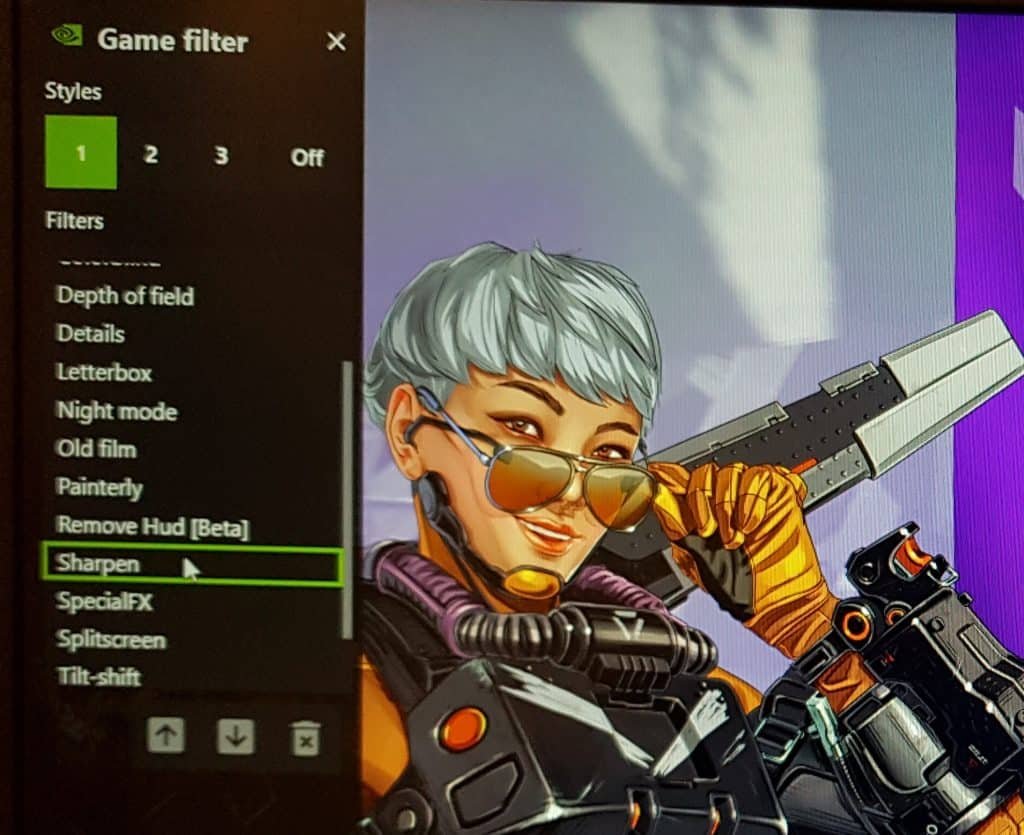
Now jump into the game and press the shortcut key. Click on the game filter, select a style from 1, 2, or 3, then click on the add filter and choose to sharpen to increase the sharpness. Close the menu, and you will clearly see the difference.
All the characters are now a lot more sharpen, and they remain as big and thick as they were before by doing their Render scale setting. Now characters will be a lot more visible to us, and their red outline will be bigger.
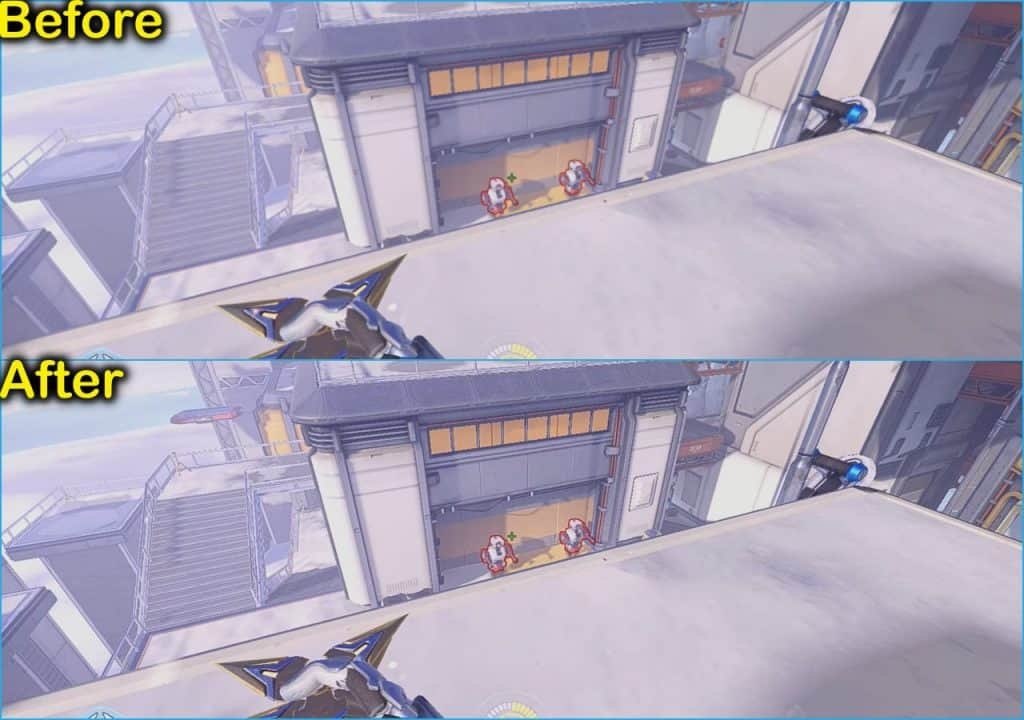
The quality will deteriorate quickly because the game has not rendered in that detail, but the game will be sharper.
Final Words
So, this is it. I hope you this guide helped you. PS: Also check out this article Overwatch Vs Paladins.
